Windows 7 is the most popular and the most used Windows ever.Window 7 is most popular and bugs free!
I also being used window 7 thats why i write this article. It is crafted for speed and the best user experience. But like every edition of Windows this too slows down with time. This is not the problem with the OS, but with the unwanted files and services that starts to accumulate. So to Speed Up Windows 7, here is our detailed guide.
Just follow each step carefully and you will have a faster Windows 7.
1. Using a Mix of Visual Effects and Performance
Windows 7 comes with many visual tweaks which provides it an amazing look and feel. But this comes against a cost, cost of performance. But we can disable these effects individually to speed up Windows 7.
Disabling Visual Effects in Windows 7
>Right-click on Computer and select Properties.
>Now in the window that opens, select Advanced System Settings in the top left.
>Go to Advanced tab and select Settings under Performance menu.
>Under Visual Effects tab you have four options. Either you can get the best Visual Appearance with degraded performance, or get the best performance with an ugly-looking operating system or you can let Window’s choose the best configuration for you or you can play with the individual options and decide yourself.
TIP: If you are on an older computer or a computer with a basic configuration then I would recommend you to select Adjust for Best Performance option. The look will be a little less attractive but it will Speed Up Windows 7 for sure.
2. Disable Start-Up Programs That Are Not Used Frequently
Most of the programs today register themselves to start up at every boot. This is done to speed up the loading of program when you run it. But these load every time you start your computer and add to the boot time. So to speed up your PC you can disable the ones you use less often.
Steps To Disable Start-up Programs :
>Open Start Menu and type msconfig and hit Enter.
>Open msconfig windows 7
>In the System Configuration window that pops up, go to the Startup tab.
>Now uncheck all the startup processes that you don’t want to be loaded at startup, or precisely the ones you don’t use often.
TIP The more applications you disable here, the less will be the boot up time.
3. Clean Temporary, Obsolete and Unwanted Files
Windows stores many temporary files when you install any program or install windows updates. It also stores the backups of update packages, backups of service pack, offline web pages, thumbnails cache, etc. But over the time they become obsolete and are no longer required by the system and thus should be removed. Windows gives you a simple solution to delete these unwanted files.
How To Remove Obsolete And Unwanted Files :
>Go to My Computer
>Right Click on the Windows installation drive ( usually C: or with a Windows logo on it ) and click on Properties
>Now select Disk Cleanup under General tab.
>Now in the Window that pops up select all the options and click OK.
>When prompted confirm the action.
>You can additionally delete System Restore points and Shadow Copies if you wish to, these are the backups that Windows take so that you can any time go back in time and all your files will be restored. This is found in the More Options tab. Deleting these restore points is completely safe since the most recent backup will not be deleted.
Clean up System Restore
4. Defragmenting Disk Drives
Fragmentation is the process of splitting a file into many segments. This is done by the operating system when there is not much space available in continuous memory locations. So the OS splits the file and stores it into different parts of the drive. But this increases the access time of the file because now the OS needs to look for different parts for the file in different locations. So defragmentation is a process by which all the parts of the file are rearranged and moved to a continuous memory location.
Perform Disk Defragmentation in Windows 7
>Go to Start Menu
>Then traverse to All Programs > System Tools > Disk Defragmenter, or you can simply type Defragment in the search box in the Start Menu and then select Defragment and Optimise Drives.
>Now click on the drive you want to defragment and then click on Analyze disk.
>After this click on Defragment disk.
TIP: I recommend you to schedule the defragmentation of the drives at least once in a week and specially for the Windows installation drive.
5. Disable Unneeded Services or Make Them Manual
Like startup programs there are many services that load at startup. They consume RAM and slow down the PC. But the good thing is, you have the authority to disable them too.
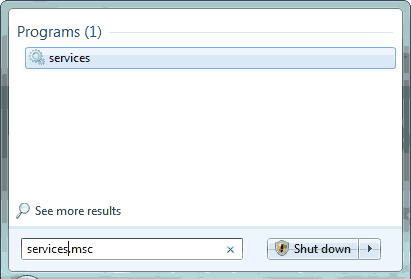
>Open Start Menu and type services.msc and hit Enter.
>Now in the Services window you will see hundreds of services listed. Just read the description of each service and see if it needs to be run automatically at every boot or you want to start it whenever required.
You have four options to choose from for each service. This can be done by right clicking on any service ans selecting Properties.
1:You can disable a service.
2:You can make it run automatically.
3:You can make it run manually.
4:You can make it to run Automatically but delayed, which means it will run after your Operating System and the programs are finished booting.
TIP: If the description is not enough to help you choose, then search with the service’s name on the web and you will have a plenty of answers.
6. Disable or Optimize Windows Search Indexing
Windows 7's Search is great but it takes high amount of resources. When your computer is running, it continuously works in the background and indexes your files to give you instant results. So, if you do not use Windows search or use it on rare occasions then you should either disable it or optimize it by limiting the locations which are indexed by Windows search.
Disable or Optimize Windows Search
>Open Start Menu and type Indexing Options.
>Open Indexing Options.
Now in the Indexing Options window, click on modify and choose the locations as per your requirements.
TIP: Use Windows Search only for “Start Menu” and “User Files” like in the screenshot above. For other files, use a software like Everything instead of Windows default search. It gives faster search results and indexes in just a couple of seconds.
7. Speed Up Windows 7 Using ReadyBoost
ReadyBoost allows you to use a USB stick as a Cache memory, it’s as simple as that. The USB devices needs to have a minimum capacity of 256 MB and a 64 KBs of free space.
Speeding Up Windows 7 using Ready Boost
>Attach any USB disk to your system.
>Open Computer, right click on the USB drive and select Properties.
>Now go to the ReadyBoost tab and select Dedicate the device to ReadyBoost to give all the available free space to ReadyBoost or manually select the size by selecting Use this device.
NOTE: ReadyBoost is not available for Solid State Drives.
8. Make Windows 7 Favor Performance Over Power Savings
Windows 7 can be set to save power or to deliver High Performance. When set for High Performance the battery consumption is high but you will get an improved system performance.
NOTE The increase in performance depends on the type of task you are performing and will not be equal every time.
To Use High Performance Plan
>Open Start Menu and type Power Plan.
>Select Choose a Power Plan from the search results.
>In the Window that opens select High Performance.
TIP: Use Power Saver or Balanced plan when on batteries and “High Performance” plan when using the system on AC power.
9. Decrease Boot Timeout
Boot timeout is the amount of time for which the OS shows the options to select the OS when you have multiple active operating systems installed, or the time for which it shows the menu for startup repair, or any other menu while booting up the computer. This is by default set to 30 seconds on Windows XP, Windows Vista, Windows 7 and Windows 8. But this is a lot of time user will ever take to make a choice. Decrease it to whatever the least value you want. In my case I have Windows 7 and Windows 8 installed and I have set the Boot Timeout to 3 seconds.
How To Decrease the Boot Timeout
>Open Start Menu and type msconfig and press Enter.
>Now go to the Boot tab and under Boot Options, change the value of Timeout to a value between 3 to 20 seconds.
>Press OK
NOTE: This may seem to have no or very less impact on the system performance, but in cases where you have multiple operating systems installed, then the performance is largely improved and it saves a lot of time.
10. NO GUI Boot
Windows while booting up shows a nice animated logo. It is visibly very attractive but also take huge resources. To speed up Windows 7 you must disable this animation.
How To Enable No GUI Boot
>Open Start Menu and Type msconfig and hit Enter.
>In the System Configuration window that opens, go to the Boot tab.
>Now, tick the No GUI Boot option under Boot Options Menu.
>Click on apply and press OK.
WARNING: After enabling NO GUI BOOT you won’t see the Windows’s animated logo and instead will see a black screen. Don’t think that your Windows has gone corrupt or the computer has hanged, instead it’s still fully functional and is booting faster.
Thats it! Now restart you window and see changes :) If you are facing any problem about this post then comment below i will help you!


.png)


.jpg)


